


Since my recent
But now I'm here to tell you how to use a miter box saw correctly so you don't screw it up and end up with this...

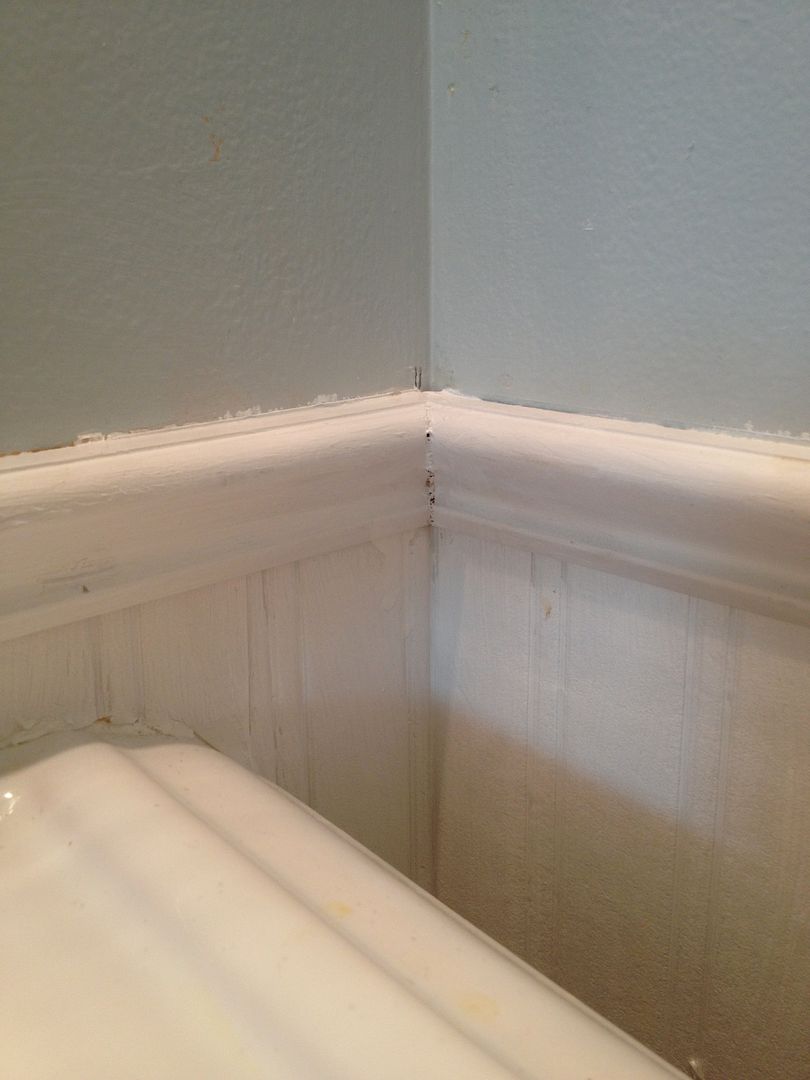
Some people may suggest measuring all your walls first and writing down the measurements and then making all the cuts. That was just too confusing for this newbie...I worked on one wall at a time and worked my way around the room. Baby steps, people, baby steps...and yes a lot of extra trips back inside.
Okay so here goes..
Step 1: Pick a wall to start and measure from corner to corner. Now measure again to make sure you measured correctly the first time.
Step 2. If you have existing floor board in the room snap a picture of the corners to help you visualize how the cuts should look on your chair rail. The cuts will be the same.
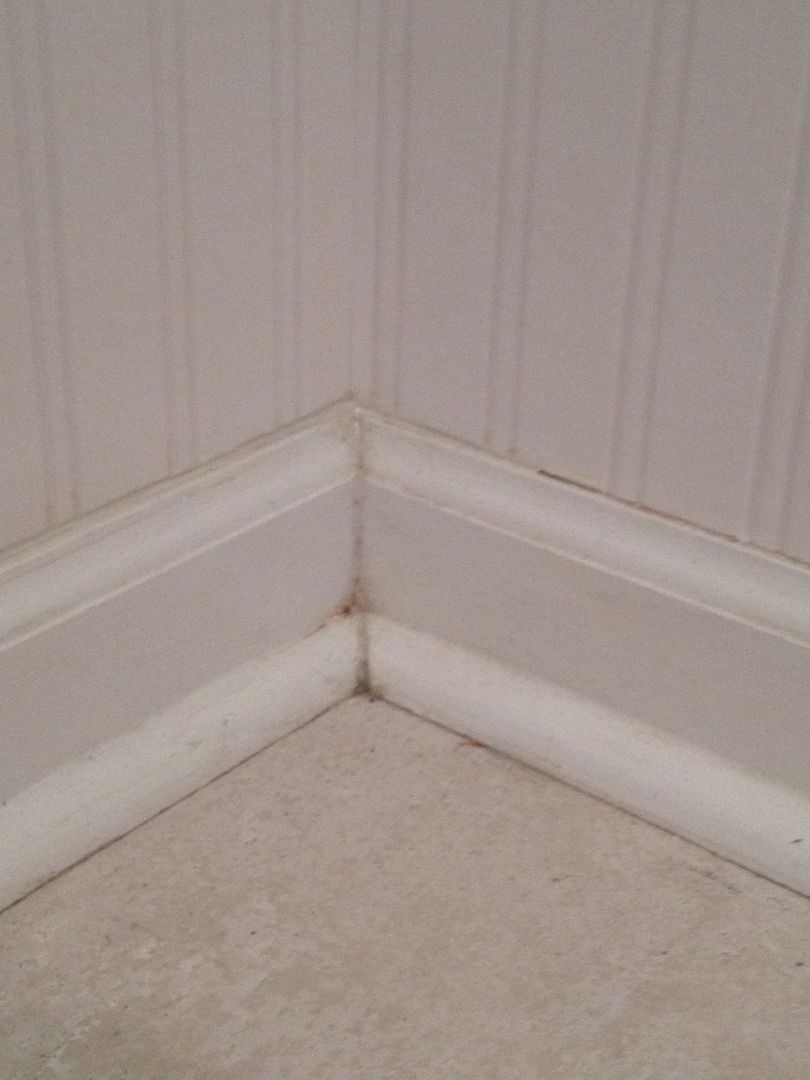 |
| Examine pre-existing floor board to copy the corner angle |
Step 3. Flip the chair rail over and measure using the length you found in step 1. Mark the spot on the back of your trim and then add a small measurement mark on the side of the top and/or bottom of the trim so you can see where it needs to line up on the saw.

Step 4. With the back of the trim flat against the side of the box saw and the top of the chair rail at the top (it should be positioned exactly like it will be on the wall) line up the mark with the saw groove.

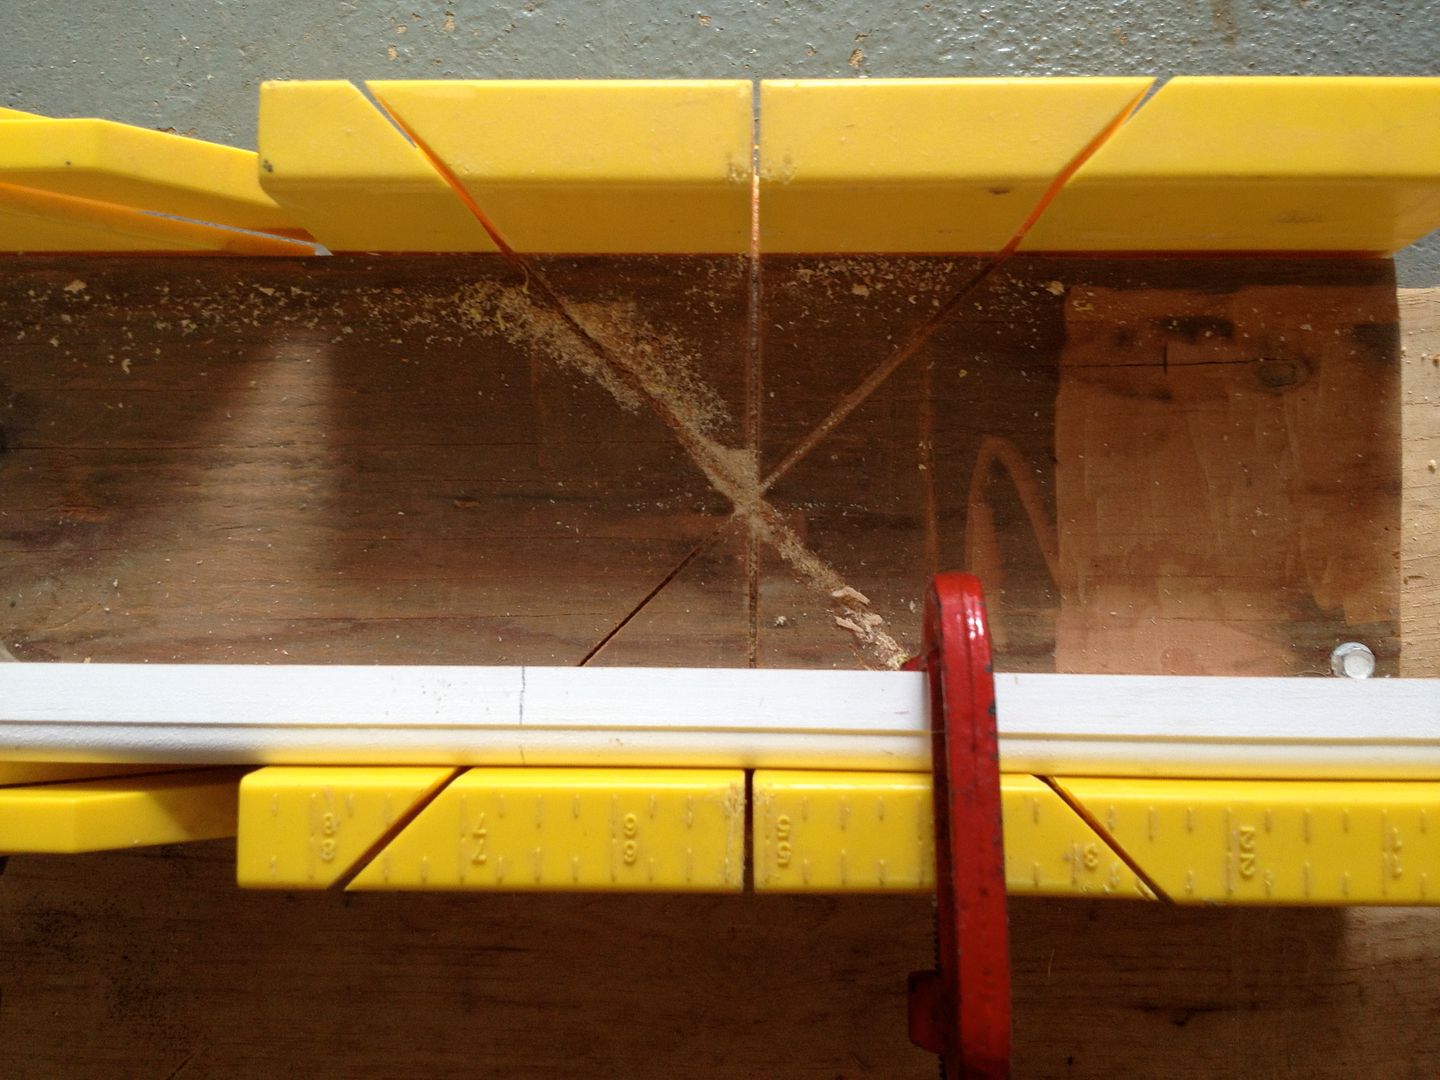 |
| WRONG! The back of the trim should be against the side of the box |
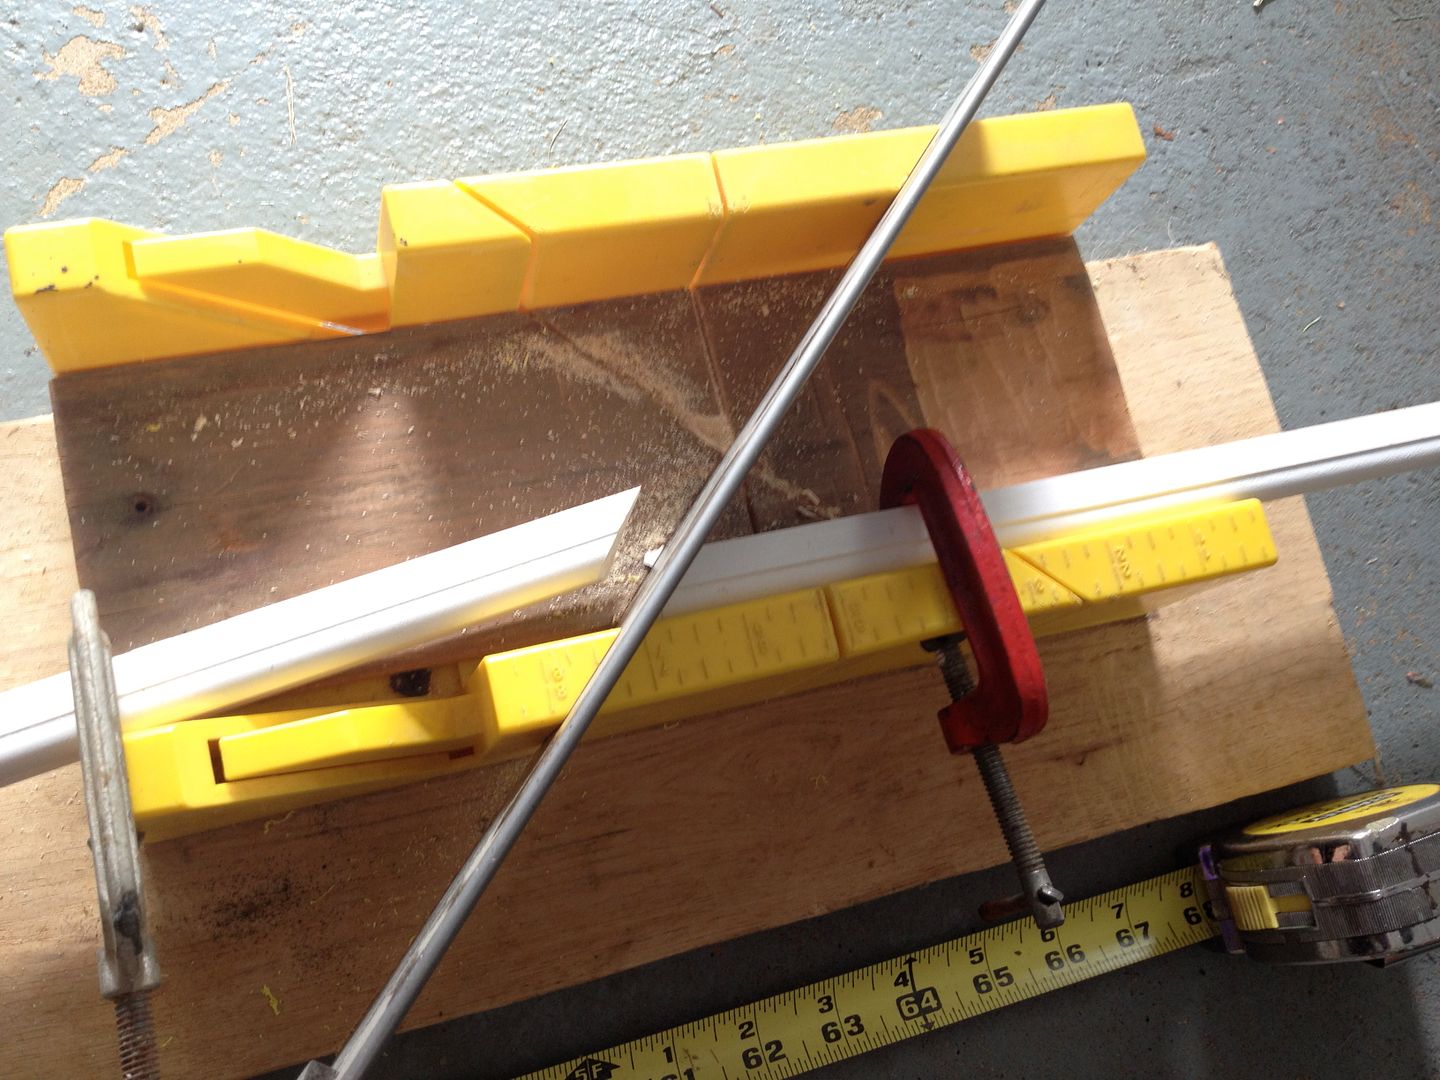 |
| Wrong again! |
Step 5. Repeat steps 3 and 4 on the other side. Remember you want to measure from the longest point - the tip of the angle. You can always shave a little off if it's too long, but if you cut too much off the trim you'll end up like me -- having to piece it together mid-wall.
Step 6. Write on the back of the trim what wall it will go on so you don't forget.

Step 7. Repeat steps 1-6 on the adjoining wall until you have cut all your trim.
Step 8. Decide exactly how high you want your chair rail to be on the wall and then mark that point all the way around the room.
Step 9. Use a stud finder and mark off where the studs are so you know where to nail in the trim.
Step 10. Starting next to the doorway (this piece will have a straight cut), use a level to make sure your trim is even. Then use a nail gun to attach your trim to the wall. Put the nails in where you have marked the studs.
Step 11. If your corners don't exactly line up or meet use a line of caulk to fill them in. Caulk fixes everything...it's like coffee and wine.
Step 12. Fill in the nail holes with nail filler.
Step 13. Paint your trim with a fresh coat of white paint.
Step 14. Stand back and be impressed with yourself...you did it!!

It was really insightful.
ReplyDeleteThanks for such a nice content.
Cheers
BTW if anyone interested more have a look View More thanks
It was really insightful.
ReplyDeleteThanks for such a nice content.
Cheers
BTW if anyone interested more have a look sawfinder.com thanks
I am not going to sugarcoat it: The chainsaw is one of the most dangerous handheld tools. That is why it is extremely important that you wear personal protective gear when using a chainsaw. The bar can cut through any material like butter, and one wrong move can lead to disastrous consequences. See here
ReplyDeleteBasic safety gear include: a safety helmet, protective goggles, earmuffs, chainsaw chaps, work gloves and steel-toed boots. This is not a suggestion, you must wear these items before chainsaw carving.
It was really insightful.
ReplyDeleteThanks for such a nice content.
Cheers
BTW if anyone interested more have a look sawfinder thanks
It was really insightful.
ReplyDeleteThanks for such a nice content.
Cheers
BTW if anyone interested more have a look https://sawfinder.com thanks
It was really insightful.
ReplyDeleteThanks for such a nice content.
Cheers
BTW if anyone interested more have a look https://sawfinder.com thanks
Thanks for such a nice content. Apppreciate it :)
ReplyDeleteCheers
If anyone interested similar one's have a look here . thanks
I would like to thank you for the efforts you have made in writing this article. I am hoping the same best work from you in the future as well. Thanks... Tiffany Chair
ReplyDelete